PhotoDesk Workflow for the Dwarf Mini
Now I’ve had the Dwarf Mini for a while I’ve developed a few methods to process the images using PhotoDesk, and here I’ll run through one possible approach. Processing astronomical images is always a balance between accuracy and aesthetics, but the most important thing is to preserve as much data as possible without adding too much (ideally, anything!).
The Mini produces a number of files for each observing session. Most importantly you have access to the raw data, with each shot — often hundreds of them — saved by default in FITS format (you can get them as TIFFs if you so choose). These contain 16-bit data which is unaligned, and undemosaiced1. They’re currently not really usable under RISC OS, unfortunately, though hopefully that will change2 .
But you also get aligned, demosaiced and stacked versions of the data in the form of high-quality PNG and FITS files — and, for our purposes, as a JPEG. It’s not ideal working with JPEGs, but it’s what I’m stuck with at the moment. And you can get pretty good results with some careful processing.
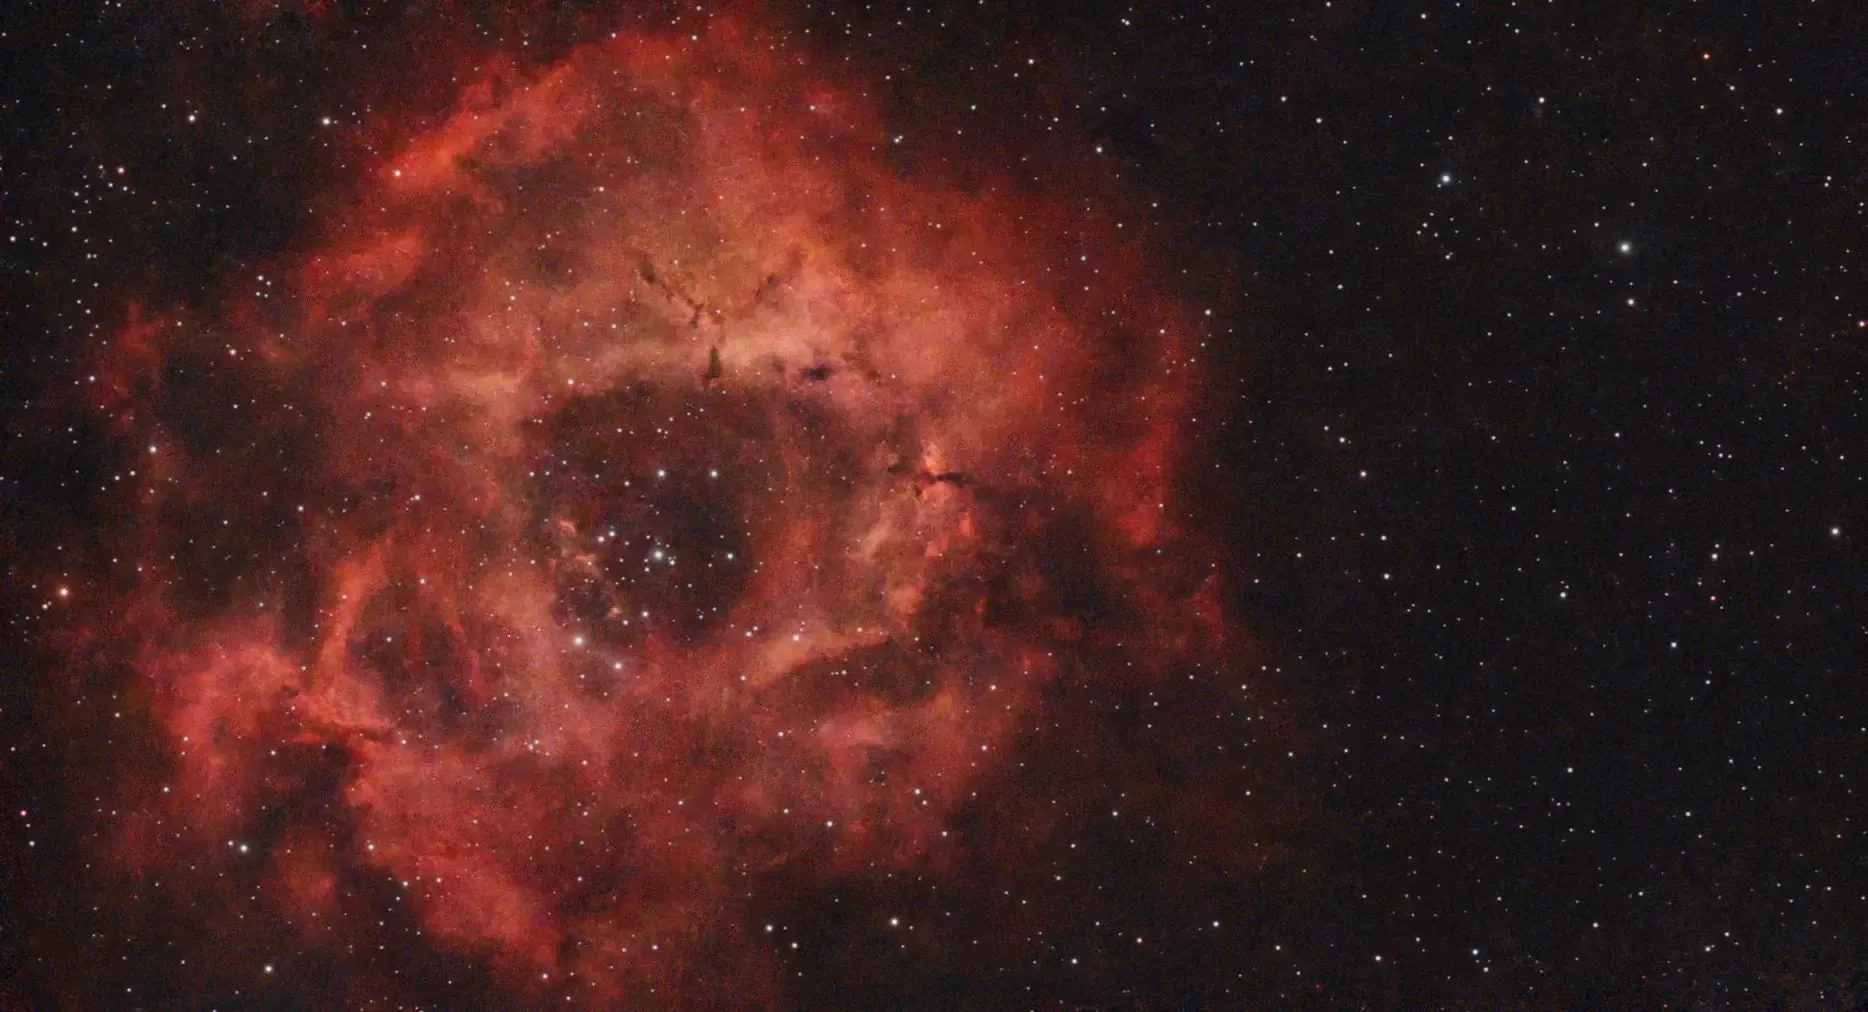
I’ll use one of my earliest sessions to demonstrate: the Rosette nebula in Orion (technically it’s in Monoceros, but it’s near Betelgeuse). I was inexperienced at the time and hope to get better results when it’s visible again, come autumn. This is the stacked JPEG the Mini produces from 92 photos with gain 90 and the Duo-Band filter; the exposure for each image was 15 seconds, and the scope was in Alt-Az mode:
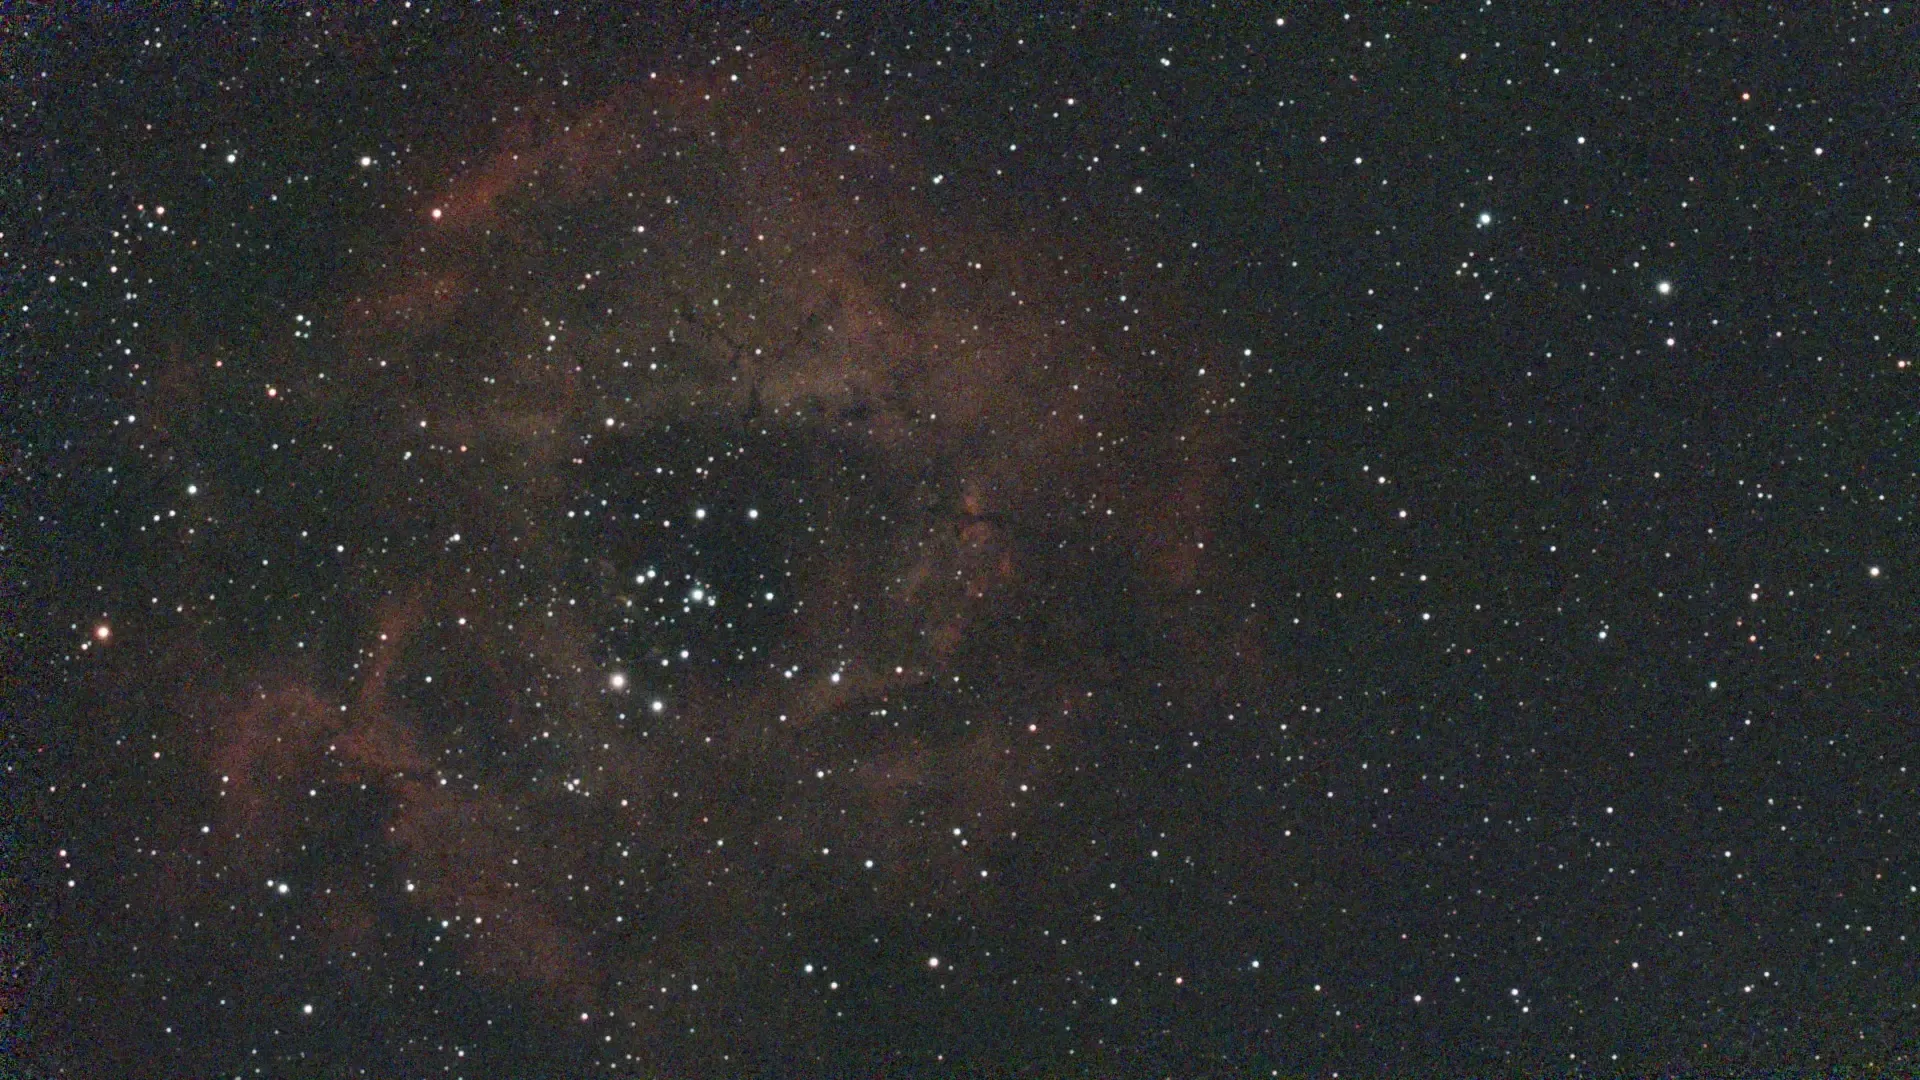
(All the images here are reduced for display purposes, but clicking on them will show them at full size. They’ve also been converted to webp format.)
Not very impressive, is it? At full size you can see the image is pretty noisy — the 90 gain was too high, and 15-second exposures are too short — and there’s not much detail in the nebulosity. The stars are also a bit smeared out, partly due to not using an equatorial mounting and partly because the nebula was fairly low in the sky; any atmospheric haze will cause star images to ‘bloom’ a bit.
The Mini has some built-in processing options3 that you can use, accessible through the Stellar Studio section of the app. This is what you get if you use the Auto setting:
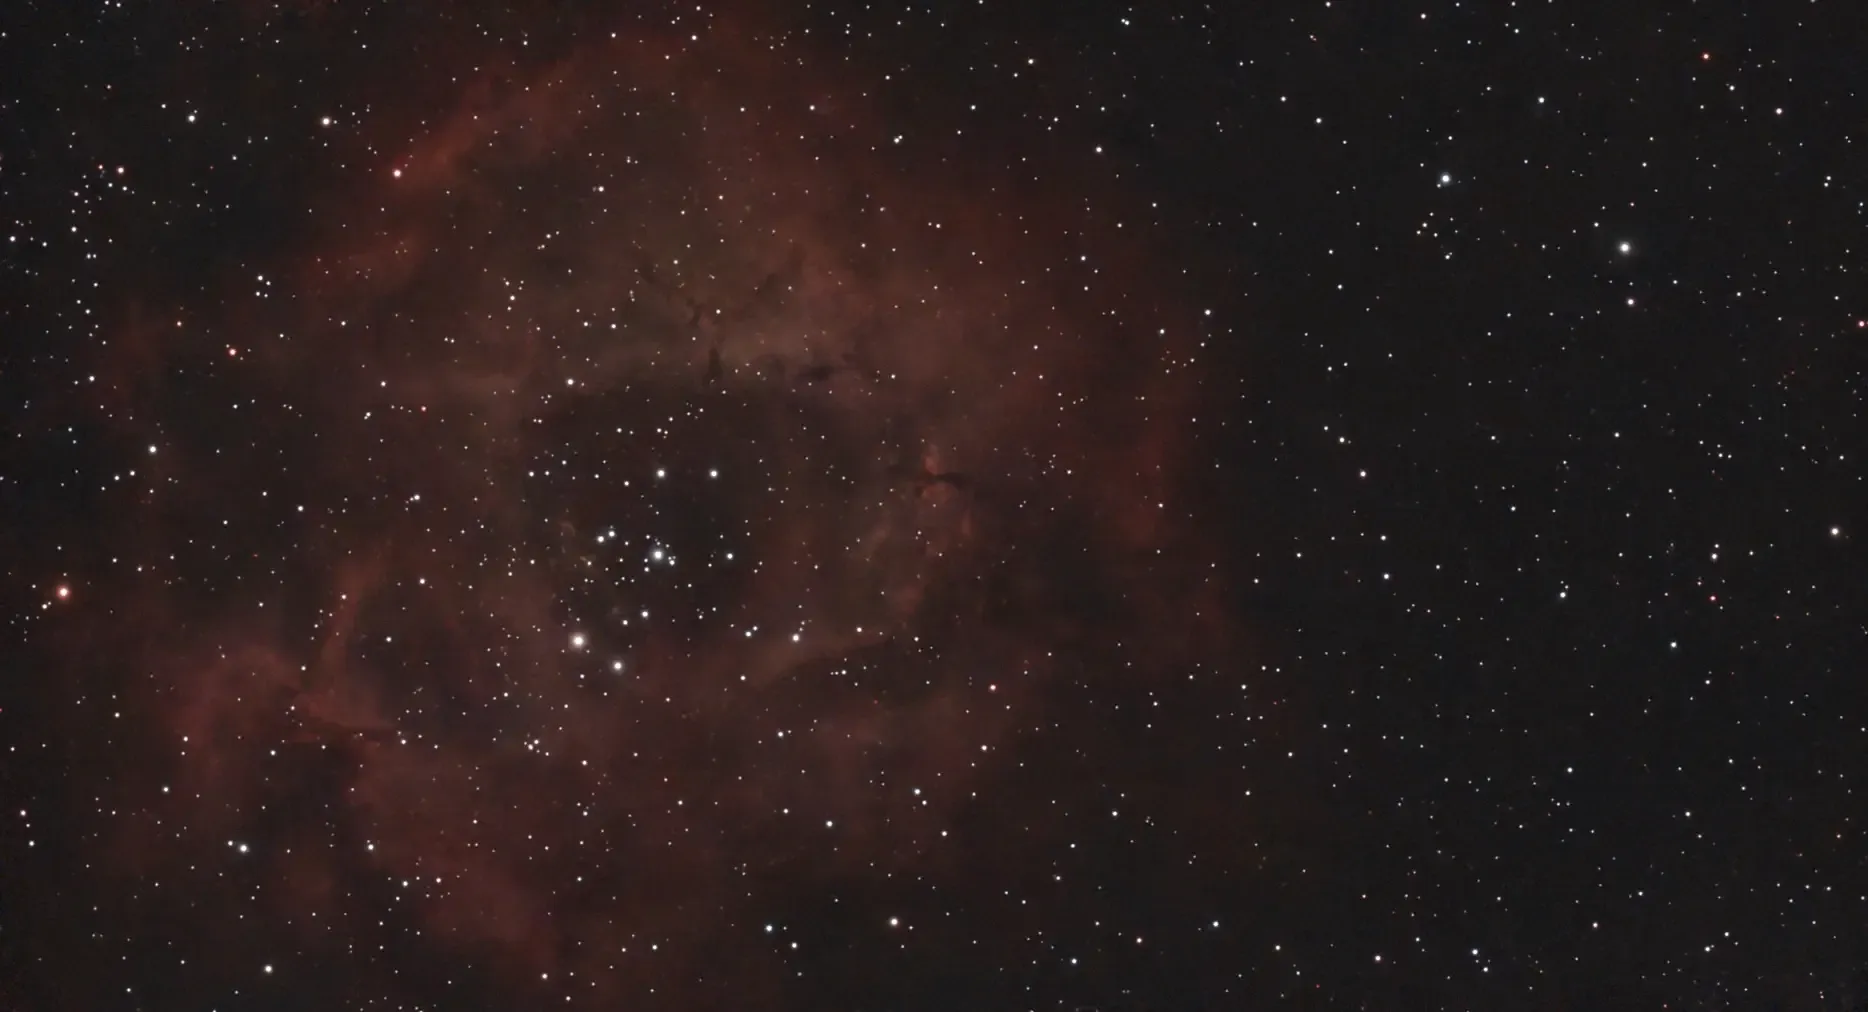
This has reduced the noise substantially, lessened the stellar blooming and brought out the nebulosity somewhat. Note also that it’s been slightly reduced in size, from 1920×1080 to 1868×1012. This is to correct for any misalignment in the original images, and to mitigate any field rotation (which affects the edges when you’re using an Alt-Az mount).
Many people would be fairly happy with that, perhaps with a small gamma adjustment in PhotoDesk to brighten it up. But it can be improved.
First, we get Stellar Studio to remove the stars:
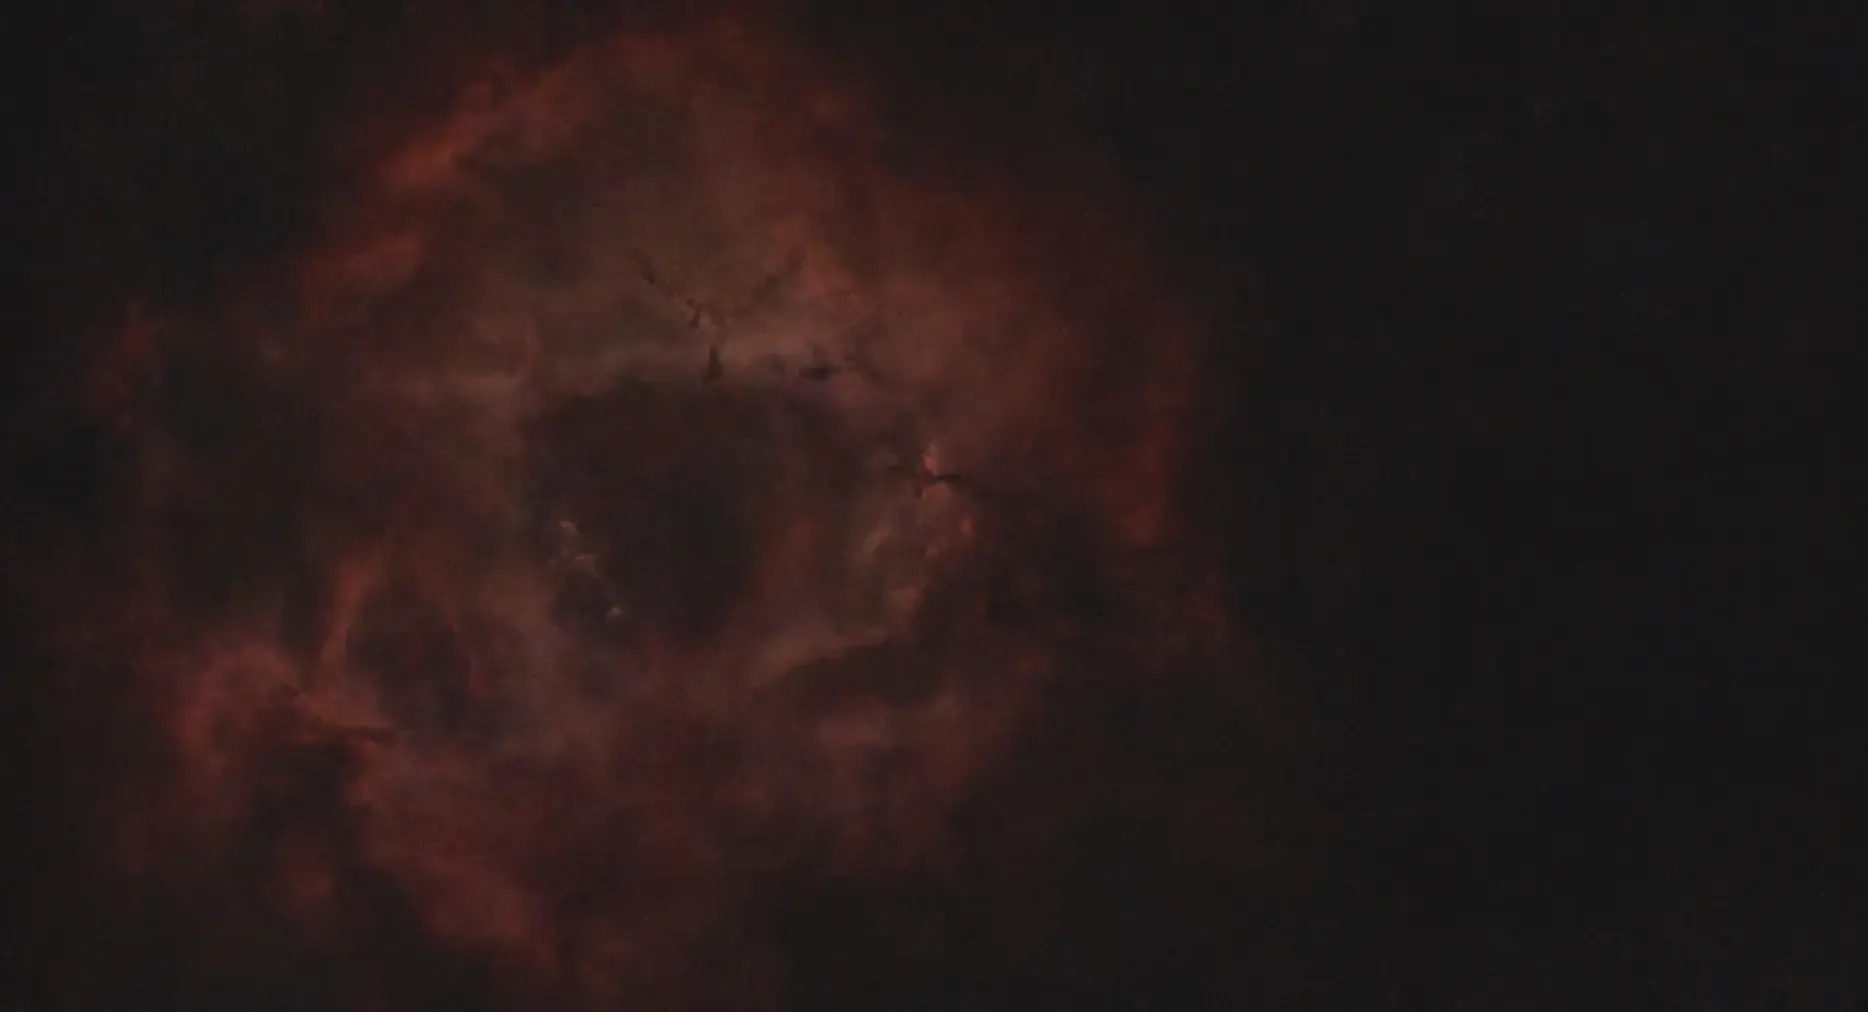
Then make a version with only the stars:
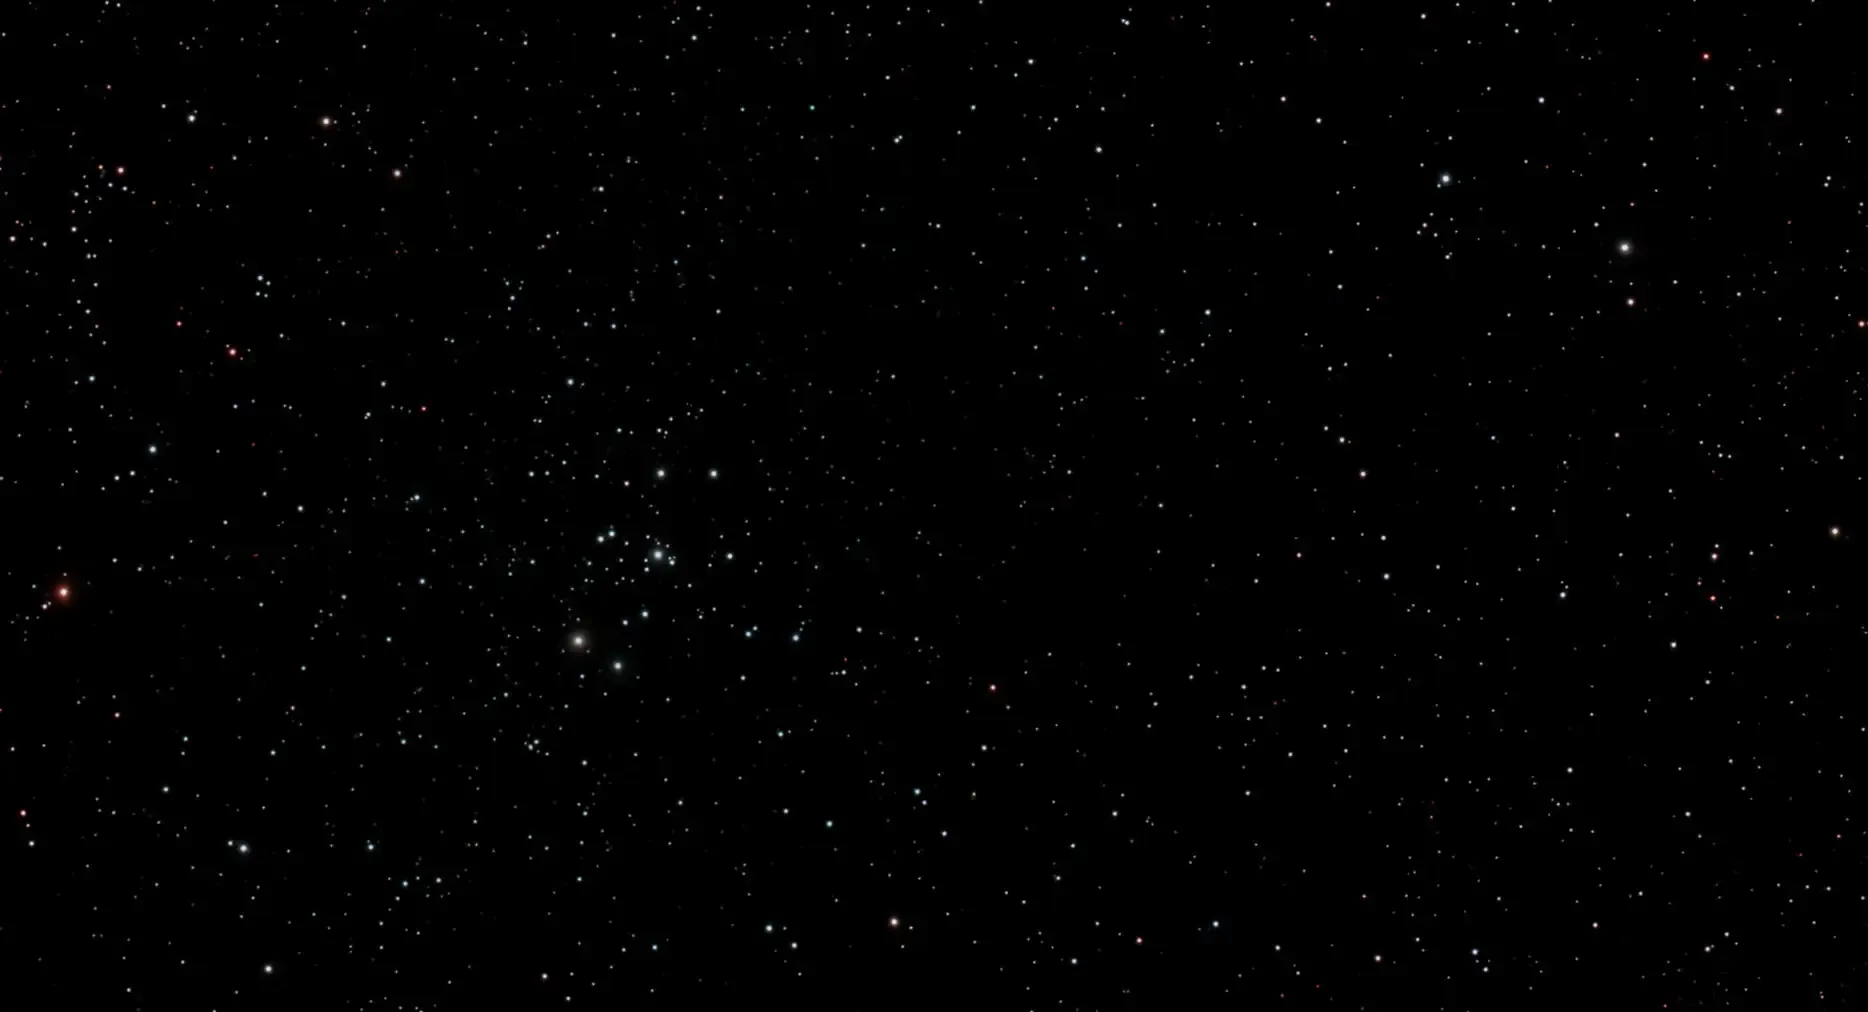
Stellar Studio lets you apply all these transforms (and others) individually. Note that all the data has been preserved — nothing’s been added, it’s just been emphasised in various ways.
Now fire up PhotoDesk and load both the ‘no stars’ and ’stars only’ images. Save the latter image — the ’stars only’ one — as a sprite, then remove it from PhotoDesk.
Add a layer called “stars” to the no-stars image, drag the sprite file you saved earlier onto the image and click on Render. Change the layer’s blending mode to Screen and the image should look pretty much identical to the ‘Auto’ one. But now you can fiddle with the nebula without affecting the stars.
Select the bottom no-stars layer by clicking on its number (0) and open Image processing:Equalise. This shows the spread of pixels in the image, and it’s bunched up on the left side of the diagram; see the left image below.
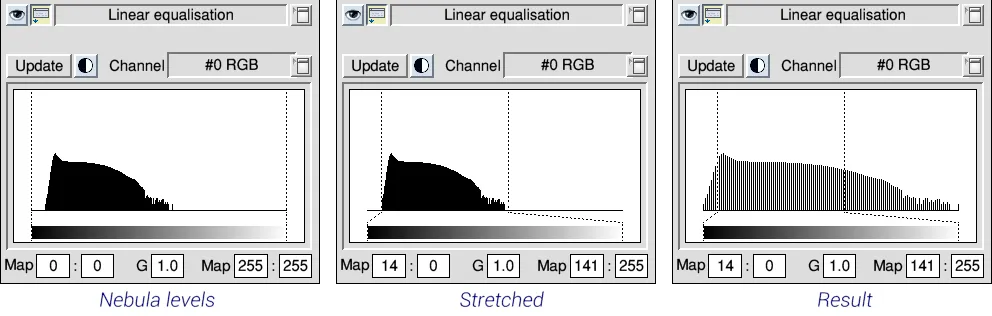
If you hadn’t separated out the nebula, the range shown would be spread over the whole area, as the stars contribute most of the brightness; the nebula information is hidden. And any change made would affect the stars too.
Click on the black/white circle — this is an ‘auto’ setting, which stretches the histogram to fill the area — to get the middle image. If you then apply this with the Wand at its Whole image setting the range is expanded, as at right. And the image updates to this:

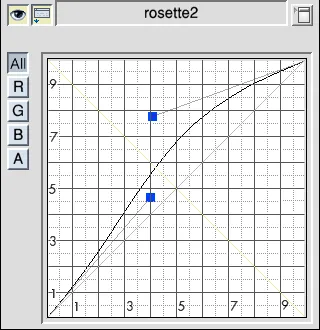
This is a great improvement, but adding a touch of gamma adjustment will give a more dramatic look. Set the curve to something like the image at left, and apply with the Wand at its Whole image setting. This is probably excessive, but it shows what can be done.
To summarise, most processing of astronomical images will involve three elements:
- levels, accessible from the equalisation dialogue
- gamma, via the image processing dialogue
- and sometimes the use of a mask to protect parts of the image from modification
Other useful facilites in PhotoDesk include:
- saturation, to boost/reduce colour intensity
- setting the black point (use Sample neutral point from the balance secion of image processing)
- sharpening and blurring
- with judicious use of the maths and calculation facilities in association with channel manipulation you can selectively boost constrained colour values
Finally, click on the eye icon in the layers window to bring the stars back, and you should get something like this:
Footnotes
- If there is such a word. ↩
- While RISC OS can’t currently handle 16-bit images — which is what you should really be working with for these purposes — if you have access to a Linux, Windows or Mac PC you can use the highly accomplished (and free) Siril program to process astronomical images. This also includes the Raspberry Pi, of course. There’s a steep learning curve, but it will pay off. ↩
- I’m fully aware that the Mini is doing most of the really hard work here (denoising, star removal). But PhotoDesk still provides ways to further improve an image. ↩
Add comment
Fill out the form below to add your own comments